Getting Started with Adventure Filmmaking

“Everyone will want to see this!”
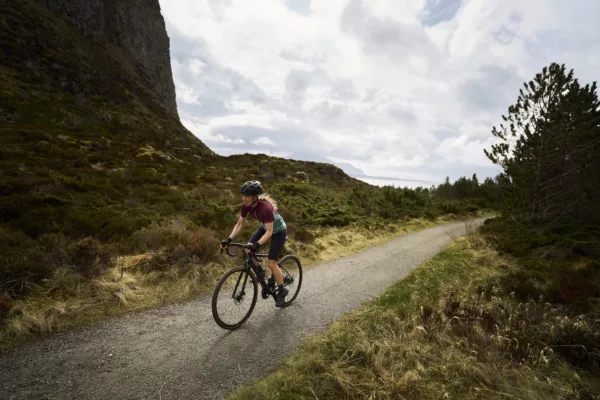
I click on my GoPro and roll downhill. I’m mountain biking in Quebec and the combination of granite bedrock, roaring rapids and a fall leaf show is blowing my mind. I can only imagine what it will look like when I edit a couple-minute film to show my friends.
That was last September. I’m still imagining.
Like many people, my hard drive is packed with memorable (and many more not-so memorable) clips of my adventures. And likely, most of it will never leave the cloud—both of data and my mind.
“These days everyone can film, but it’s actually dealing with and editing all that footage that’s hard,” says Patrick Latcham, a film editor and founder of ProEditors, an online video editing service (see sidebar). “The software can be hard to use and sorting and editing footage is really time-consuming.”
And even if we get over the time hurdle and actually edit our own video, the end result is often disappointing. Sure, we all have a video camera, but putting it to good use is more involved than remembering to simply hold our phones horizontally. Here is what the pros tell me I need to do to make a kick-ass outdoor video.

Equipment
The best camera is the one you have on hand. And today, for most of us, that’s our phone. The footage modern smartphones capture is great for everything up to movie screens. But before shooting anything, tweak the camera’s default settings to the highest frames per second. Adding an app and even accessory lenses unlocks the phone’s full potential (see sidebar).
Now, add basic sound recording equipment with at least one microphone. Quality sound takes a movie from mediocre to worth-watching and is often overlooked, says Keith Partridge, an instructor at The Banff Centre’s Adventure Filmmakers Workshop and the author of The Adventure Game: A Cameraman’s Tales from Films at the Edge.
Finally, a tripod is not necessary but comes in handy, especially for time-lapses and shake-free panoramas.
Maybe most important is being familiar with the equipment. “The technology should be so familiar that its operation is instinctive,” says Partridge. “That way you will not miss that moment.”
Before
Leave the camera in your pocket and spend time planning. Focus on the story. The best videos take the viewer on some kind of journey and include basic narrative elements and structure. The more of these you have, the more complex and engaging a film will be. Think about a beginning, middle and end. Maybe add some characterization—why are you doing this? What are you hoping to achieve? What are you scared of? Look for moments where the hero’s journey reaches an impasse. And then draw the story to an end with a conclusion: triumph, failure, closure. Write all this down. Imagine what your film might look like and think about what kind of images you’ll need to tell the story. From this, create a list of shots that you want to capture. You won’t follow any of this exactly, but it will help keep you on track.
During
Pull out your camera and start filming. As you do, follow these tips.
Tell the Story
Think of filming like taking your audience along with you for the experience. That means filming more than just skiing a rad line. “The shots before and after the action really tell the story,” says Latcham.
Say you’re heading to Whistler for a day of skiing: film loading the skis in the car, the snow on the trees during the drive, gearing up in the parking lot, the lift ride, the après beer, your buddy snoring in the back seat on the drive home. “All that helps sets the scene,” Latcham continues.
Shoot from Multiple Perspectives
Point-of-view cameras make it easy to log hours of footage, but the world from your helmet gets boring after a while. Vary the angles and point of view. Shoot wide, close up and everything in between. Be creative. Film your friends skiing past. Set the camera up in a snowbank and rip beside it.
Record Sound
“Learn to assess what is acceptable sound and know how to record it,” says Partridge.
Know Your Equipment’s Limitations
Don’t try to film a lion hunting a gazelle on a mobile phone and expect to achieve the same result as you see in top wildlife films.
Stay with Your Subject
When filming a person doing something, film them for as long as possible, says Partridge. Hose-piping, where the lens doesn’t stay on the subject long enough to see what’s going on, is one of the big mistakes he sees inexperienced videographers make.
Use a Tripod
Shaky footage is hard to watch and a tripod is the best way to avoid it. When handholding, think of creating a tripod with your body: plant your feet, tuck elbows into your sides and move your torso side to side. Your neck is a natural stabilizer, too, so head-cam shots are often steady.
Shoot Horizontal
We know you know, but it’s worth repeating. Shoot horizontal with your phone, not vertical. Footage can be rotated to sit horizontal in editing software, but it will leave black bars on the sides that make you look like a rookie.
After
Once you have all your footage, upload it and make a backup. Rethink your story. Watch the footage and write a draft of your movie. Start up your editing program. There are plenty of free ones and many more professional ones. Only upgrade to the fancy ones if you know how to use more sophisticated editing tools.
Open with a compelling and interesting segment for the start, something that’s fun to watch and grabs attention. For the rest of the film, collect a mix of action and non-action shots, and varying angles to keep the movie visually interesting. Drop it all into the editor, roughly trim each segment, leaving extra footage on either side, and lay them out in sequence.
Now be ruthless, says Partridge. “People editing their own material will keep shots in because they love that shot, but it doesn’t push the story forward,” he says. “Get non-connected people to watch and offer constructive criticism. Act on their input unless you can justify why you wouldn’t.”
Once you’ve settled on the footage, it’s time to start tweaking—doing it before this stage will waste time, says Latcham. Lay the music and audio over the footage. Trim footage so transitions sync with the beat drops in the songs and the audio. Add some titles and credits.
And just like that, you’re ready for a screening.
Apps & Accessories
FiLMiC Pro ($9.99)
Turns a smartphone into a DSLR with better zoom, more control of frame rates and improved audio recording.
RØDE Rec LE (free)
Records broadcast quality audio and helps you edit it.
Lapse It (free)
Time lapses are awesome, but hard to do. This app helps set them up and record them with ease.
Sun Surveyor ($9.99)
Predicts the position of the sun and moon at any time and place. With integration with street view, maps and a 3D compass, it’s ideal for knowing when the light will be best for shooting.
OlloClip (from $80)
Clip these lenses onto your iPhone or iPad to add telephoto, wide-angle and macro shooting to your repertoire. olloclip.com
ProEditors: Let the Pros Edit for You
When Patrick Latcham asked people with GoPros mounted to their helmets about what they did with the footage, most admitted they didn’t know how to edit it. He figured it couldn’t be that hard to help them out. With a co-founder, he created ProEditors. Filmers drag and drop up to 30 minutes of their footage to proeditors.com, tag their favourite moments and then go back to playing outside. Within about three days, professional editors turn it into a two-minute video complete with theme music. The whole thing costs $100 (US). And Latcham is offering explore readers a 20 per cent discount on their first film. Use promo code Explore20 at the checkout.


